Oak porch kits have become an enduring favourite for UK homeowners, with their blend of classic style and modern practicality attracting more attention than ever in 2026. Whether you are drawn to the warmth of natural timber or the instant boost to kerb appeal, an oak porch kit is an investment that stands the test of time.
This guide is designed to be your essential companion, providing clear, step-by-step instructions for selecting, installing, and caring for your oak porch kit. We aim to make the entire process straightforward, from understanding kit types and regulations, to mastering installation and long-term maintenance.
You will discover expert advice, practical tips, and everything you need to confidently bring your vision to life. Let us help you create a welcoming entrance that truly transforms your home.
Understanding Oak Porch Kits: Types, Benefits & Trends
Oak porch kits are transforming the look of UK homes, offering a harmonious blend of tradition and modern convenience. These pre-fabricated solutions have captured the attention of self-builders and homeowners alike, providing a straightforward way to add character and value to any property.
What is an Oak Porch Kit?
An oak porch kit is a ready-to-assemble package containing all the essential components needed to build a high-quality porch using solid oak. The kit is precision-machined, with each timber pre-cut and numbered, making assembly accessible for both professionals and enthusiastic DIYers.
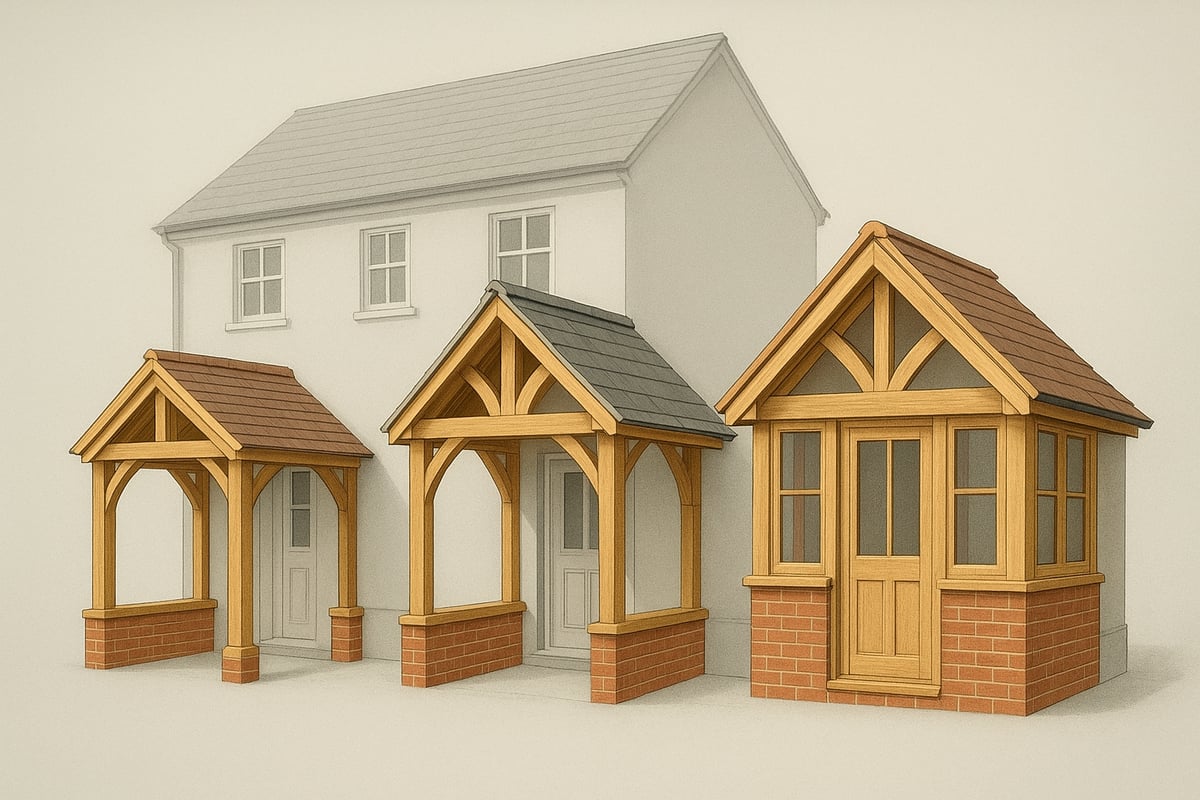
There are three main types of oak porch kit: lean-to, enclosed, and open. Lean-to kits are fixed against the property wall and typically feature a simple sloping roof. Enclosed kits come with side panels or glazing, offering extra shelter and privacy. Open designs create a welcoming focal point, using exposed oak beams and braces for visual impact.
When it comes to installation, you can choose between wall-mounted kits that attach directly to your home, or brick plinth designs where the oak frame sits on a low brick wall. This flexibility allows you to match the porch perfectly to your property’s style.
For those seeking more inspiration or to browse available models, Oak porch kit options show the variety of designs on the market, from classic to contemporary.
Key Benefits of Oak Porch Kits
Choosing an oak porch kit brings a host of advantages. First, it instantly enhances kerb appeal and can increase your property’s value. The natural beauty of oak, especially when crafted from sustainably sourced timber like Quercus Robur or Petraea, ensures your porch remains a standout feature for decades.
Durability is another major benefit. Oak is renowned for its longevity and resistance to weather, making it ideal for the UK climate. Many kits use QP1-grade French oak and carry Q-Mark certification, ensuring they meet strict quality and sustainability standards.
Assembly is made simple with modern manufacturing techniques. CNC machining guarantees precise joints, and pre-numbered parts streamline the build process. This reduces installation time and minimises errors, making an oak porch kit appealing to both experienced tradespeople and confident DIYers.
The environmental impact is also positive. Using responsibly sourced oak supports sustainable forestry and reduces your carbon footprint compared to less durable materials. This blend of practicality and eco-friendliness is a strong selling point for today’s homeowners.
Latest Trends for 2026
In 2026, the oak porch kit market is experiencing a surge in demand as homeowners seek eco-friendly, modular outdoor structures. Both contemporary and classic styles are popular, with straight-post frames offering a minimalist look, while curved braces provide a timeless, traditional feel.
There is growing interest in integrating smart home features, such as discreet lighting or security sensors, directly into the porch design. Glazed panels and side screens are also on trend, offering extra weather protection while maintaining an open, airy feel.
Data from industry competitors highlights a notable increase in installations across the UK, reflecting the enduring appeal and practicality of the oak porch kit. As more people look to personalise their outdoor spaces, expect further innovation in materials, finishes, and customisation options.
The oak porch kit stands out as a versatile solution, balancing craftsmanship, sustainability, and modern living needs.
Planning Your Oak Porch Project: Regulations, Design & Budget
Embarking on an oak porch kit project is an exciting opportunity to enhance your home’s character and value. Before you begin, careful planning is crucial to ensure a smooth process from concept to completion. This section breaks down the essentials: understanding UK planning rules, designing a porch that fits your style, managing costs, and scheduling each stage for success.

Navigating UK Planning Permission & Building Regulations
Before installing an oak porch kit, it is essential to understand the planning rules that apply to your property. In many cases, porches fall under permitted development, which means you can proceed without formal planning consent if certain criteria are met. Typically, your porch must not exceed three square metres in floor area, must be no higher than three metres above ground level, and must be set back more than two metres from any boundary facing a highway.
However, exceptions exist. If your home is listed, located within a conservation area, or affected by an Article 4 direction, permissions may be required. Building regulations can also come into play, especially when structural changes or electrical work are involved. Always check with your local authority.
For the most up-to-date official advice, consult the UK porch planning permission guidelines. This resource helps clarify whether you need permission for your oak porch kit and highlights important compliance details.
Designing Your Porch: Style, Size & Customisation
A well-designed oak porch kit should complement your home’s architecture and reflect your personal taste. Choose between lean-to, enclosed, or open porch styles to match your property’s character. Traditional homes might suit a gabled front with curved braces, while contemporary houses often look best with straight-post, minimalist designs.
Customisation is key. Decide on roof types, such as tiled or slate, and consider adding side glazing or decorative panels for extra kerb appeal. Brick plinths can create a robust base and add another layer of visual interest. Whether you opt for a standard or bespoke oak porch kit, ensure the dimensions and proportions harmonise with your entrance.
Bespoke options also allow you to tailor features like porch depth, roof pitch, and timber detailing. Consult your supplier early to explore all available design choices before committing to your final plan.
Budgeting & Cost Considerations
Budgeting for your oak porch kit project requires a clear understanding of all potential expenses. Costs typically range from £1,485 to £6,385 depending on the size, complexity, timber grade, and custom features selected. Standard kits are usually more affordable, while bespoke solutions can command a premium due to personalised design and materials.
Here is a summary of key cost factors:
| Feature | Impact on Cost |
|---|---|
| Size (floor area) | Higher size, higher cost |
| Oak grade (e.g., QP1) | Premium grades cost more |
| Roof type & finish | Tiles, slates, or glazing add cost |
| Installation method | DIY is cheaper than hiring professionals |
Remember, a quality oak porch kit adds tangible value to your home, often increasing kerb appeal and market price. Compare professional installation quotes with DIY options to decide which approach best fits your budget.
Timeline & Project Planning
Effective project planning ensures your oak porch kit installation progresses smoothly and avoids unnecessary delays. Begin by confirming supplier lead times; many offer super-fast delivery, but bespoke kits may require several weeks for manufacturing. Schedule groundworks and foundation preparation to coincide with kit delivery.
Next, allocate time for assembly and finishing. DIY installation may take a weekend, while professional fitting can be completed even quicker. Consider weather conditions, especially during winter or periods of heavy rain, as these can delay groundworks or roofing.
Plan for clear site access, safe storage of materials, and coordination with any additional trades such as electricians or roofers. A well-structured timeline helps you stay on track and ensures your oak porch kit is installed efficiently and to the highest standard.
Choosing the Right Oak Porch Kit: Materials, Quality & Suppliers
Selecting the best oak porch kit for your home is a crucial step that determines not only the look but also the longevity and value of your investment. Understanding material quality, kit construction, and reputable suppliers will help you make a confident, informed choice.
Understanding Oak Grades & Sourcing
The heart of any oak porch kit is its timber. Not all oak is created equal, and the grade directly impacts both visual appeal and durability. QP1-grade oak is considered the benchmark for structural joinery, with minimal knots or defects. If you see references to Q-Mark or green oak, these indicate compliance with strict standards for strength and responsible forestry.
When evaluating an oak porch kit, look for timber sourced from reputable species such as Quercus Robur or Petraea. These European oaks offer excellent grain and stability, making them ideal for exposed outdoor structures in the UK's varied climate.
Sustainability is equally important. Many leading suppliers use only FSC or PEFC-certified timber, ensuring your oak porch kit is environmentally responsible. Always check for certification and ask about the origin of the oak before committing to a purchase.
Evaluating Kit Quality: What to Look For
High-quality oak porch kit construction blends traditional joinery with modern technology. Precision CNC machining guarantees each component fits perfectly, while mortise and tenon joints provide superior strength and a classic aesthetic. Numbered parts and detailed assembly instructions simplify the build, even for those new to timber framing.
A complete oak porch kit should include all necessary fixings, pre-drilled holes, oak pegs, and planning drawings. This reduces on-site guesswork and ensures a smooth, efficient installation. Some suppliers also provide optional extras, such as decorative braces or side panels, to further personalise your project.
When reviewing kit specifications, consider asking:
- Are all joints pre-cut and ready for assembly?
- Are the timbers kiln-dried or green?
- Is the oak graded and certified for structural use?
These factors can make the difference between a porch that lasts decades and one that quickly shows signs of wear.
Comparing Suppliers & Product Options
Choosing the right supplier for your oak porch kit is as important as the product itself. Look for companies with a proven reputation, robust quality assurance processes, and transparent sourcing policies. Sustainability credentials, such as FSC or PEFC certification, indicate a genuine commitment to the environment.
A good supplier will offer clear pricing, comprehensive aftercare, and responsive customer support. Many provide trade discounts or guarantees for peace of mind. Compare standard oak porch kit packages with bespoke options, as the latter can offer tailored sizing, unique features, or adaptations for specific house styles.
Use the table below to summarise key supplier comparison points:
| Criteria | Standard Kits | Bespoke Kits |
|---|---|---|
| Price | Lower | Higher |
| Customisation | Limited | Extensive |
| Lead Time | Shorter | Longer |
| Aftercare | Basic | Enhanced |
| Design Support | Standard | Personalised |
This approach helps you weigh up value versus flexibility and identify the right match for your project.
Bespoke oak porch solutions
If your vision extends beyond standard sizes or styles, a bespoke oak porch kit could be the answer. With a custom approach, you can specify every detail, from roof pitch to intricate joinery, ensuring the porch perfectly complements your property’s architecture.
Bespoke solutions allow for unique features such as curved braces, integrated glazing, or matching brick plinths. This level of flexibility is ideal for period homes or those with unusual layouts. Working with an experienced supplier ensures your oak porch kit not only fits flawlessly but also meets all structural and planning requirements.
For homeowners seeking a truly personalised result, exploring bespoke oak porch solutions provides inspiration and expert guidance throughout the design and installation process.
Step-by-Step Oak Porch Kit Installation Guide
Installing an oak porch kit is a rewarding project that enhances both the functionality and appearance of any UK home. This step-by-step guide will walk you through each phase, providing clarity and confidence as you transform your entrance. Whether you are an experienced DIY enthusiast or a first-time installer, following these instructions will ensure your oak porch kit stands the test of time.
Step 1: Site Preparation & Foundations
Proper site preparation is the cornerstone of a successful oak porch kit installation. Begin by assessing your chosen location, ensuring it is free from roots, debris, and any obstructions that could undermine stability. Mark out the exact footprint of your oak porch kit using string and stakes for accuracy.
Next, select your foundation type. Most commonly, concrete pads, brick plinths, or existing hard standings are used. Check for a level surface, as an uneven base can create long-term structural issues. Use a spirit level and tape measure to confirm all dimensions. Prioritise drainage to prevent water pooling near the base. By laying a solid foundation, you guarantee your oak porch kit will remain secure and durable for years.
Step 2: Unpacking & Checking Kit Components
Once your foundation is ready, carefully unpack your oak porch kit. Lay out all components in a logical order, referencing the included assembly instructions. Most kits feature pre-numbered parts, which streamlines the build process.
Conduct a thorough inventory check. Confirm that you have received every beam, post, peg, fixing, and bracket detailed in the kit’s manual. Inspect each piece for any visible damage or manufacturing defects. If you spot any issues, contact your supplier immediately for replacements. This step ensures your oak porch kit installation proceeds smoothly without delays or complications.
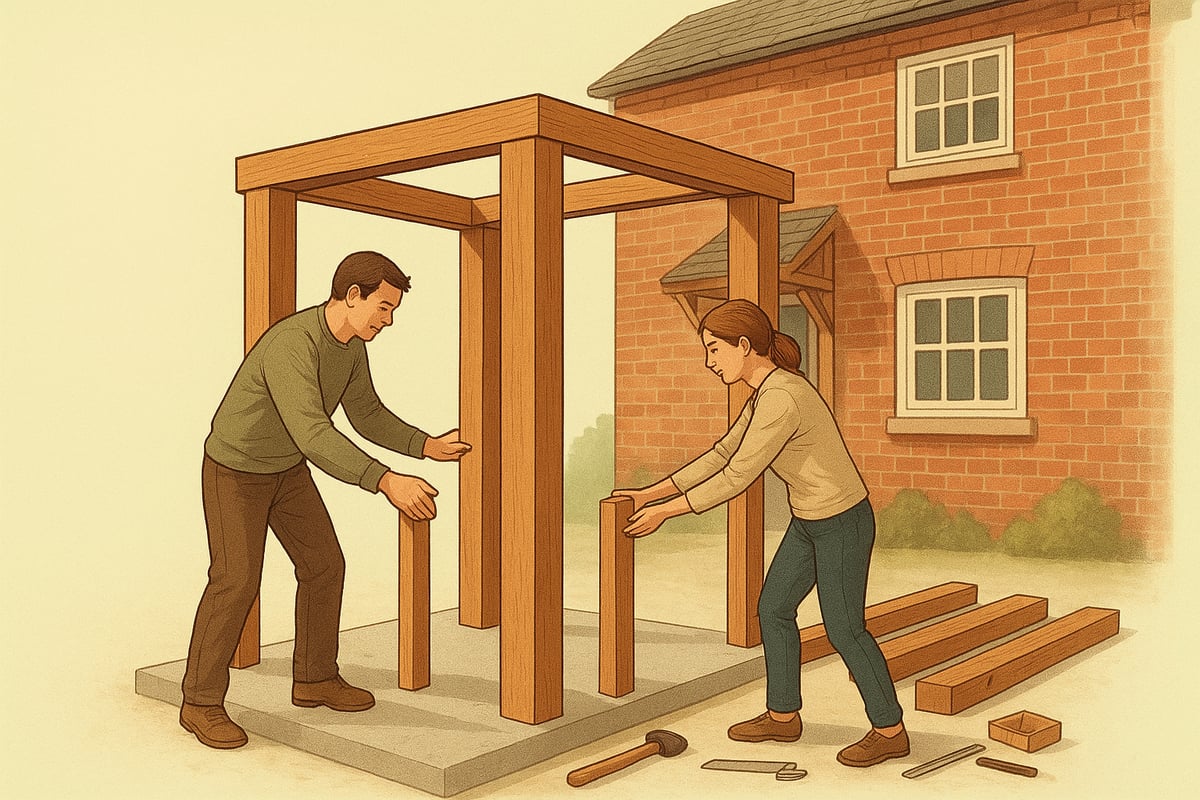
Step 3: Assembling the Frame
With all components accounted for, you can begin assembling the frame of your oak porch kit. Start by positioning the base timbers, aligning them with your marked-out foundation. Insert the upright posts into the base, ensuring each joint fits snugly.
Most oak porch kit designs use traditional mortise and tenon joints, which are both strong and visually appealing. Secure these joints with the supplied oak pegs, tapping them gently into place. The use of CNC-machined, pre-cut joints guarantees precise alignment and a seamless fit. Take your time during this stage, double-checking each connection for accuracy and stability.
Step 4: Installing Roof Trusses & Rafters
The next phase involves positioning and fixing the roof trusses, gable ends, and rafters. Lay out the trusses according to the assembly drawings, lifting them onto the upright posts with care. Secure each truss, ensuring it sits flush with the frame.
Select the appropriate roof pitch and overhang as specified in your oak porch kit design. Fix the rafters in place, spacing them evenly for optimal support. Use a level to verify that all roof elements are correctly aligned. This careful approach will create a robust structure, ready for roofing and finishing touches.
Step 5: Fixing to House Wall or Brick Plinth
Attaching your oak porch kit to the property is a crucial step for overall stability. Align the assembled frame precisely with the house wall or brick plinth, checking both vertical and horizontal levels. Use heavy-duty fixings provided in your kit to anchor the posts securely.
If fixing to a brick plinth, ensure the posts are seated on damp-proof course to prevent moisture ingress. For wall-mounted designs, select the appropriate brackets and fixings as recommended. This step ensures your oak porch kit is firmly integrated with your home, ready to withstand the elements.
Step 6: Roofing & Finishing Touches
With the main structure in place, it is time to add roofing materials to your oak porch kit. Choose from tiles, slates, or even thatch, depending on your property style and planning requirements. Secure each roofing element, following the manufacturer’s installation guidance for weatherproofing.
Now add decorative braces, side glazing, or panels, if included in your kit. Consider custom features or upgrades, such as those found on Oak kit installation extras, to personalise your porch. Seal all joints as needed and apply a suitable protective finish if you wish to preserve the oak’s original colour. These touches complete the transformation and showcase the beauty of your oak porch kit.
Step 7: Final Inspection & Clean-Up
The last stage of your oak porch kit installation is a comprehensive inspection. Walk around the structure, checking for any loose fixings, gaps, or misalignments. Test the stability of all posts and beams by applying gentle pressure.
Clean the work area, removing any offcuts, packaging, and tools. Review your aftercare instructions, noting recommended maintenance intervals for your oak porch kit. By completing these final checks, you ensure your new porch is safe, secure, and ready to welcome guests in style.
Maintenance, Aftercare & Longevity Tips
Regular care and attention are essential for getting the very best from your oak porch kit. With the right approach, you can ensure your investment remains sturdy and beautiful, year after year. This section covers everything you need to know about routine maintenance, natural weathering, repairs, and expert advice for long-lasting results.
Routine Maintenance for Oak Porches
Keeping your oak porch kit in excellent condition starts with regular maintenance. Begin by removing leaves, dirt, and other debris from both the timber and surrounding ground. This simple task helps prevent water traps and the build-up of moss or algae.
Inspect your oak porch kit for any early signs of movement, splits, or insect activity. A quick check every few months allows you to address minor issues before they become significant problems. Maintaining a clean and dry environment around your porch further extends its lifespan.
Oak Weathering & Natural Changes
Oak is a living material that responds naturally to the elements. Over time, your oak porch kit will begin to develop a striking silver-grey patina, a process known as silvering. This change is not only visually appealing but also a sign of the wood’s natural resilience.
Some splits and surface checks may appear as the timber acclimatises. These are usually normal and part of the oak’s character, especially in green oak. However, if you notice unusually large or deep cracks, it is wise to seek professional advice to ensure your oak porch kit remains structurally sound.
Aftercare Products & Treatments
When considering aftercare for your oak porch kit, you have several options. Some homeowners prefer to treat the wood with specialist oils or breathable preservatives. These products can slow the weathering process and offer additional protection, especially in exposed locations.
Before applying any treatment, check that it is suitable for use on oak. Many experts suggest allowing the oak to weather naturally, as this reduces maintenance and highlights the wood’s authentic beauty. If you decide to treat your oak porch kit, always follow the manufacturer’s instructions closely.
Repairing & Upgrading Your Porch
Even the highest-quality oak porch kit may need minor repairs over time. Replacing loose pegs or tightening joints is usually straightforward with basic tools. Check that all fixings remain secure and free from rust or corrosion.
Upgrading your oak porch kit is also possible. You could add glazing, decorative braces, or even lighting to enhance its appearance and function. These upgrades can be carried out as your needs or tastes evolve, giving your porch kit a renewed sense of style and value.
Ensuring Longevity: Common Pitfalls to Avoid
To maximise the lifespan of your oak porch kit, avoid common pitfalls that can shorten its service life. Ensure water drains freely away from the base, and check that no soil or debris is building up against the timber. Poor drainage can lead to premature decay.
Regularly inspect roof coverings and fixings to ensure they remain watertight and secure. Avoid using inappropriate cleaning products that might damage the oak’s surface. For more guidance or troubleshooting support, you can consult the Oak porch kit FAQs for expert answers to common questions.
Taking these steps will help your oak porch kit stay strong, beautiful, and functional for decades to come.
Expert Advice, FAQs & Troubleshooting
Navigating an oak porch kit project can raise many questions, from regulations to installation. This section provides concise answers, troubleshooting guidance, and expert tips to ensure every step of your journey is smooth, informed, and successful.
Frequently Asked Questions About Oak Porch Kits
When planning an oak porch kit, several questions come up. Do you need planning permission? In most cases, small porches are covered by permitted development, but exceptions apply, such as listed buildings or properties in conservation areas. For detailed scenarios, see Porch planning permission considerations.
Installation for an oak porch kit typically takes one to three days, depending on complexity. Kits can often be customised after delivery, although some changes may require new components. A standard oak porch kit generally includes pre-cut timbers, pegs, fixings, and full instructions.
Troubleshooting Common Installation Issues
Occasionally, challenges arise during an oak porch kit assembly. If the ground is uneven, use packers or adjust the foundation to ensure level support before frame assembly. Misaligned frames can result from incorrect placement of base timbers; always check measurements and use a spirit level.
Missing or damaged components should be reported to your supplier immediately. Keep all packaging until the oak porch kit is fully assembled to ensure nothing is misplaced. If you encounter persistent issues, consult your supplier’s technical support for tailored advice.
Expert Tips for a Flawless Finish
For a seamless result, blend your oak porch kit with the architecture of your home. Match roof materials and pitch to your existing structure for a cohesive look. Consider adding decorative braces or glazed side panels for extra character.
Use high-quality fixings and always follow the manufacturer’s assembly instructions closely. When selecting finishes, opt for breathable oils if you wish to preserve the oak’s golden colour, or allow it to weather naturally for a silvered effect. Attention to detail ensures your oak porch kit enhances kerb appeal and value.
When to Seek Professional Help
While many homeowners can install an oak porch kit themselves, some situations require professional input. Complex groundworks, such as deep concrete pads on sloping sites, may need a builder’s expertise. If your design includes bespoke features or structural modifications, consult a specialist for planning and execution.
If you are unsure about compliance with building regulations or structural safety, engaging a professional ensures peace of mind. Their experience can help avoid costly mistakes and deliver a durable, beautiful result for your oak porch kit.
Resources for Further Support
Reliable resources help you make informed decisions about your oak porch kit. For building regulation guidance, consult Building regulations for porches, which explains exemptions and compliance requirements.
Trade bodies like the Structural Timber Association and oak framing specialists offer technical support and installation guides. Many suppliers provide aftercare advice and customer service channels. With these resources, you will have the support needed for a smooth oak porch kit project from start to finish.
Now that you understand the ins and outs of oak porch kits—from selecting the right materials to mastering the installation process—you’re well equipped to start planning a project that will transform your home’s entrance and add lasting value. If you’re ready to turn inspiration into reality, why not take the next step with expert support and tailored solutions from Acorn to Oak Framing? You can explore bespoke options, get advice on compliance, and ensure your porch is crafted to the highest standard for UK homes. Start your journey today—BUILD NOW


